Wednesday, August 30, 2017

Interpretive Toolbox: Verbal techniques, Part 1.

This blog post is continuing the series on Interpretive methods and techniques. The first layered zone was planned techniques, followed by subtle techniques. This blog will focus on the verbal zone of interpretive techniques and methods for better interpretive experiences. Verbal layer interpretive techniques make up the largest category of interpretive techniques and methods, and they will be broken into parts rather than have a mammoth sized blog that exhaustively describes each technique. These techniques are easily used in verbal exchanges with visitors, but can also be be planned for readable text or exhibit displays and even active methods types.  Verbal techniques help bring visitors to understand the message of the program - "selling them" on your "product". As with all things verbal, how you say something is as important as what you say.

Start with the basics: introduce yourself. This ties into rapport from the previous layer and it is a great way to start. Long ago, a wise public speaker and educator taught me that having a professional opening or introduction should never begin "OK" or "alright". It is a mental crutch, as if you are psyching yourself up into a task. Start with a loud enough to hear "Good morning" or other similar beginning. Do not immediately jump into the material as people will not be ready for you to being with content that quickly. Visitors are expecting some sort of introduction for them to realize the program is beginning, to end whatever they were doing (socializing, reading, browsing the bookstore, etc) and settle and then focus on you, the guide, so you cannot start with critical information until everyone is settled upon you. Identify who you are and what you do at your workplace and what you intend to do (conduct a tour, bring you to the event area, pass out materials, etc). Be loud, clear, and concise with your introduction. I like to bring up safety concerns right away after introducing myself because it gives a sense of security that the interpreter has already reviewed the safety concerns and brings up what to think about before getting started.

The following list are the first twenty techniques and methods of verbal interaction with the visitors. Making a program interactive is better for the visitors, even though they may not necessarily be doing anything but speaking with you or others, so that they are not left to be a passive part of a program. Some techniques are more active than others, while some maybe difficult to use because it takes some skill to weave into a program. Others are so simple that you might not think of them as a technique but when used for your purposes and used with enough other techniques can make a compelling program.

Allegory - Use of symbols to tell a story that illustrates a larger, historical story or a hidden meaning. Its use is similar to metaphors in that you can use metaphors to make an allegorical situation or take a real situation and make it into a allegory, or even a moral-to-the-story. Aesop's Fables are generally allegorical; classic stories such as the Tortoise and the Hare teach a moral or could be used as reference to historical characters.

Alliteration - The use of words with the same letter or sound for effect. This technique can also be used effectively in a written form. An example of this is the old rhyme of Peter Piper picked a peck of pickled peppers.

Ascribing human-like qualities to
non-human things, eh? This lunch
bag is disappointed.  
Analogy - At a basic level an analogy is a comparison of two things, usually explaining one using the other. This is a tremendously deep topic that can be delving into off topic depth (see that analogy?). Since it is such a large topic, being brief will allow you to find your own way of handling analogies. Sometimes keeping them simple can make them more comprehensible. Remember similes? Similes use "like" or "as" to make comparisons.

Anecdote- A short story that connects the material. It is usually insightful or humorous, but helps highlight a part of the narrative. Funny story: It took me an embarrassing amount of time to try and define anecdote and come up with an anecdotal story.

Anthropomorphism - Giving human qualities to non-human things. Animals that talk and rocks that walk and time that flies are examples of anthropomorphism. This technique works well with children but not exclusively.

Aphorism - Pithy statements that are short and to the point. "The pen is mightier than the sword". It is best to use sparingly, since they often border on cliche.

Balance of Opinions - This a technique is core to creating audience based connections because everyone has an opinion and not everyone makes the same conclusions or draws the same meanings. so explore differing viewpoints within the content and within the visiting public. Not quite on a conflicting level, but showing multiple perspectives to show that the events, people, objects, and other details are not all perceived the same way or any one narrative dominated.

Before and After - This is a classic method that looks at before an event or circumstance and how consequences changed after. This can apply to landscape, places, and people. This technique can be used with a chronological framework since before comes before and after discusses what was the results and further how those results affect the now.

Cacophony - The use of harsh sounding words to create an effect. This can also be further emphasized by the interpreter when spoken aloud. Emphasizing a crack or a crunch by use of the voice in creating a realistic sound can help bring the visitors into a program.

What a character!


Cause and Effect- Like Before and After but can deal with roots and causes rather than a circumstances or situations and how the actions created consequences and results.

Characterization - Creating a character. A little different than Living History and first person because it is a more general concept. Living History and first person portrayals are characterizations but not all characterizations are Living History since they can be other things like birds, rocks, tree, or other objects. This technique is useful with children because it is done all the time with singing birds and dancing animals in cartoons and such.

Chronology- A method of arranging material from beginning to the end. This technique works well in conjunction with Before and After and Cause and Effect. The sequence of events is its own story and framework for telling a story. It's simple but effective for people to follow.

Commentary- An expression of your own personal opinion. This helps separate the interpreter from the material, especially when the material gets controversial. It can be used to help explain the reasons for why things happened they way they did. It also makes you more than the 'teacher' because you react to the material as well. Personally, I like using asides and commentary to also give a different perspective using a Balance of Opinion technique.

Compare and Contrast- Another old school style analytical technique. This technique can be done together or separate such as just contrasting or just comparing. It is simple but effective; there is a reason why you did so much of this during school!

Conflict- Conflict involves two or more opposing view points. Conflict can be civil or can be aggressive; everything from an argument to full-scale war. Using conflict can be a great asset to create narrative because conflict is drama! Explaining the conflict and hinting at the resolution can bait a visiting crowd with anticipation.

Conjecture- This is a conclusion based on guesses and logical deduction. It can be used to allude to the future and to the events or reasons for your program.

Context- Context sets the situation or event in place with larger circumstances. It explains that people, objects, events, and decisions were not in a vacuum, but are a result of the cumulative effects of everything leading up to that point. On the opposite side, having things out of context robs the program of a lot of meaning. What was going on at the time and how did that influence the decisions about the content of the program? With historical interpretation, context can be everything.

Contrived Situation- Also called hypotheticals, this technique takes the amassed body of knowledge and changes variables to test with the visitors what they think would be the result for a point. Hypothetically speaking, the interpreter could pose nearly any situation based on what they had shared so far and fish for guesses as to what might have changed. One popular example is "What if the South won the Civil War?"

Conversation- Also called discussion, this technique breaks down the teacher/student barrier and all have an equal chance at contributing. This is a favorite technique that has the favor with audience focused interpretation. Basically discuss the topic or program with the other visitors and give and receive feedback. One drawback to having a conversation is that if the program is about something visitors know very little about, it is hard to have an informed conversation about it. If you spoke with a scientist that wanted to have a conversation about applied thermodynamics, how much good input would you be able to give in this hypothetical case?

Critique- a style of analysis that evaluates some aspects and posits how or what could be done better or how a visitor would do something. This technique will be often used near the end of the program, if not actually in the conclusion, since it needs material to work with in order to be effective. For example, demonstrate something and ask the audience what they would do differently.

This is only part of the verbal styled techniques more are going to follow. If I'm feeling ambitious I will release them over the course of September since there are so many of them and doing a monthly blog would stretch out these techniques unnecessarily. So stay tuned for further parts to this series.

Post Script: I relied on Handles: A Compendium of Interpretive Techniques to Help Visitors Grasp Resource Meanings by Peggy Ann Scherbaum for ideas and material to share.

Saturday, July 22, 2017

Interpretive Toolbox: Subtle Physical Skills

Continuing the series on Interpretive techniques and methods in subtle skills, we come to the physical aspects that the interpreter does to enhance or inhibit the interpretive program. To the visitor, these skills are not necessarily noticeable; they are something that is innate to the interpreter, but are in fact a planned and calculated part of the interpretive experience.They are the nuanced actions of the interpreter that draw in visitors and make for a more sensory presentation.These are very close to the verbal skills an interpreter uses, but are going to be treated in their own category. The subtle skill layer of interpretation has everything to do with how the interpreter acts and as such, the interpreter must be self aware of his actions as well as presence. They can add to a presentation or detract from it. Therefore, every element of the subtle personal must be mastered for interpretive effort.

Sometimes dirt don't hurt, in fact, it might give you some
extra credibility!
First, get a look at yourself. One's personal appearance can have an effect on the visitor. Basic grooming needs to be addressed first. Ideally, the interpreters should be well groomed like all adults should. We are professionals, so we need to act like it. Comb your hair, brush your teeth (and floss too!), use deodorant, wash your face and body. These basics are essential. What is your reaction to people who look like they do not own a mirror or cannot afford to wash themselves? If you cannot do this there had better be a good reason for it, for example, portraying a soldier on a long campaign. Shaving can be a little bit of a trickier thing since different organizations have different standards regarding grooming. I did a post on the benefit of having facial hair, but some organizations may have a no facial hair policy so that will require you to shave. A few days growth can change a visitor's perception of you, context being the largest factor. If you wear an official uniform (like the National Park Service, for example) or expected to be clean shaven, the appearance is sloppy. If wearing living history clothing, a few days growth may add a saltiness to the impression. Your clothing is the next layer out. If you wear an official uniform, it needs to be in compliance, neat, clean, and pressed. If you get to wear a "business casual" clothing, it also needs to be neat and clean in appearance. A name tags or name plate is really the mark of a professional. It says that you belong to the organization, so make sure it is worn. If there is no standard as to where your name plate goes, one thing I was taught was to put it on the chest nearest the arm you use to shake hands, typically on the right side. Reaching up to shake hands draws the eyes up and to the name tag. In some cases there is no uniform standard because the "uniform standard" is Living History clothing on a daily basis. If so, research how to best take care of the clothing. I usually do not clean those clothes as often for a number of reasons, such as dirt can add a degree of authenticity to a position. For example, naturally dirty knees and sleeves on farming clothes compared to freshly laundered farm clothes tells a visitor that you were actually working and not bumming around an office and came out for a tour or program.

Body Language is an extension of the body; it's what the body does. What the body does is send subtle messages about the interpreter and the message. Think of Body Language as a larger category and made up of gestures, facial expressions, and body movement. Or to put it concretely: hands, face, and everything else. Shifting, pacing, self touching, nervous ticks, and lowered gaze are all examples of negative body language and tell visitors that the interpreter is unsure, uncomfortable, and probably not very prepared for the presentation or program. Those are body movements because they take place all over the body even using the hands at times or the head. Self touching, like scratching, chewing nails, holding your arm or hands, rubbing your face, or playing with your hair are all self soothing actions done to soothe the body in anxiety or nervousness. This means that you are uncomfortable and that you are trying to make yourself comfortable. But it makes people uncomfortable to watch. Most unintentional body language is subconscious and unintentional. The best way to change this into a positive message is to be aware of your actions by making all actions intentional. This takes knowing yourself and watching yourself. Do your talk, program, or presentation and record it or have someone, like an interpreter or a supervisor, constructively critique your body language to find out what you do when all eyes are on you. When presenting, try to relax. It will get easier the more you do a program and remembering each detail will be a part of what you do, so when you are comfortable, your body will reflect that, and in turn, the message to the visitor is that that interpreter knows their material and is comfortable, therefore I can be comfortable too.

Gestures give you something to do with your hands that can
be effective tools to emphasis and assist your speaking so
learn to use them effectively.
Gestures are actions done with the hands; they are a part of the body movement, but enough goes on with the hands that gestures really needed their own paragraph. We manipulate most of our lives with our hands, so it would be natural that we try to manipulate the interpretive process to our advantage. Some people talk with their hands while other do not. Hands in the pockets while presenting is being too comfortable, it gives a lazy or unconcerned impression. Gestures have the ability to make symbolic movement that can accent a presentation or detract from one. One helpful thing to do, if you do not know what to do with your hands, is to put them naturally by your sides. At first try it feels weird, but look in a mirror; it will look natural. It is okay not to gesture or talk with your hands, but you do need to do something with them. If you are going to do something with them, know what you are doing. He may not be a great example, but consider Adolf Hitler as a speaker (completely apart from his ideology). He studied the emotional impact of his gesturing while giving his speeches and had photographers take pictures of his gestures to use them for full effect on the crowd. What does a fist mean, particularly if you pound it into your cupped hand? What about an outstretched hand to the people? What if you point to your mind? Each gesture means something and can be used to further your message if you learn how to use it. If nothing else, pointing to things is among the easiest gesture to master. Also, sign language is a great way to keep your hands busy, reach others in the crowd, and further get your message across.
Unshaven, frowning, furrowed brow, not very good
eye contact so what impression does this face make upon
ye? Is it a favorable one? Would you like a tour from
someone with this kind of expression?

The third component to Body Language is Facial Expression. The face is very expressive, down to the minute details, and people can pick up on those expressions. Your face can give away if you are tired, irritated, or comfortable. Like body movement, most of these actions of the face are subconscious; you do them without thinking. The trick, like body movement, is to master the subconscious motion into intentional actions that reinforce your message. If doing a program stresses you out, take some time to prepare yourself internally so you can be calm and relaxed when you begin. It will rub off onto the visitors one way or another; by being facially relaxed and happy, it will work to your advantage. The best way to improve your facial expression is to smile. It's easy, simple, and will go a long way. Smiling is the visual equivalent to the firm handshake because it lets people know who you are and how you are feeling at this exact moment. Also, what you do with your eyes is important. "The eyes are the window of the soul" the old adage goes, and their role should not be overlooked. Crowd scanning is important because it gives energy and movement to the program, but indicates also that you are addressing multiple individuals as you go. Eye contact helps reinforce this by connecting you with the visitor visually. People want to be talked to, not talked at. Poor eye contact disengages you from the visitor and you from them. If you are looking at them and they do not meet your eyes, that is their choice not to engage. Your job is to engage them and if they do not want to engage you will have to find another way to do it.
Clean appearance, smiling, good eye contact;
what impression does this make on ye?

 A final consideration that spans a few categories is rapport. Being a likable person can be crucial to a program. It combines a number of attributes like attitude, personality, voice, presence, being outgoing, and effective use of body language. A program can be given with zero rapport and still be a good program, but often having a rapport with the visitors makes a program memorable and personal. Your program is only really part of what we want to achieve through interpretation. Remember, that interpretation is about provocation and letting the visitor feel how important to you this whole thing is based on how much you love them, love your location, and the material that you present. If you want them to care, show them how much you care.

Next month I will examine the verbal layer of interpretive methods and techniques, and it will probably be in a few parts because there are numerous methods to go over!

Changes in Photobucket policy

Photobucket has changed it's policy regarding third party hosting so that paid members may embed photos into their blog, site, what have you. Since I had been using Photobucket as a third party host, I will need to make some changes. Please be patient while I fix this up in the mean time.
Thank you to all the loyal readers so far!

Thursday, June 22, 2017

Interpretive Toolbox: Subtle Environmental Skills

The second layer to the skills and tools used in interpreting are subtle skills that have much to do with the physical presentation of the program. To the visitors they are not necessarily noticeable, something that is innate to the situation in which the visitors finds themselves but is in fact a planned and calculated part of the interpretive experience. They are the nuanced conditions the interpreter uses that draws in visitors and makes for a more sensory presentation. This environment is not necessarily "nature", but also being at the place, or it could even be imaginary.
The Power of Place at Appomattox Court House at the
150th anniversary.

One of the more powerful subtle skills that should already be on your side is the
Power of Place. If you work at a historic site that, for example, was where something of personal, national, or even international happened, being in that place is enough to be an interpretive technique. It is already built into your program. Being there at the place can be very significant to some people. Being at the epicenter even more so. For example, being in the exact place where someone stood, sat, lay, or died can amplify this technique. Combine it with exact time (fall, or October, of a date in October, or 2:35 pm on a date in October) can also amplify this technique as being significant. Anniversaries of the event in rules of 5 also help get people closer to what it actually felt like as well. The point of this technique is to put oneself into the scene as the people experienced it. Visitors want to know what it was like, being where it happened gets them closer, and every little step mentioned helps make that connection closer or deeper. To some, this might be a intellectual connection, but those that feel the emotional connection, it could be what makes their experience meaningful for a lifetime. For example, I mentioned my own experience of being at Appomattox Court House for the 150th anniversary of the surrendering of General Lee. I was at the place, I was there at the time, and I was on an anniversary of the event. To me, such an experience was both intellectual as well as emotional, as I had literally placed myself in the shoes of a soldier experiencing this event. The Power of Place can be a incredible tool to use.


Walnut Hill is a fictitious community that Living History
 Farms
 uses to create a setting for visitors to experience life
in the 19th century. You can read about my experiences at this
place in my earlier blog posts. 
Some places, like museums, disconnected from an exacting place, may struggle creating that place, but can recreate an experience in other ways. One of these ways involves portraying a setting. This setting can be a physical mock-up or an imaginary one. Making a setting can help the visitor understand what it was like if they were there, but cannot actually be there. Talking about the setting at the foot of San Juan Hill in Cuba in the Spanish-American War or what the wilderness was like when the pioneers crossed the plains will help fill in the obvious gaps.


Spatial arrangement and proximity in action: How do you react
to how a things are arranged in this picture? From this blog post
Spatial Arrangement can be used as a technique to help reinforce ideas in a display or in an active activity. This can be added to the planning layer but the subtle placement can have its own meanings. Arranging exhibits or sensory objects, especially into themes, can help the interpreter reinforce their point. This concept interrelates with proximity. Does the closeness of things mean connectivity or make someone uncomfortable? Are their distance apart taken for aloofness or disconnection, or a example of great distance? Have you taken the time to arrange things or is it always set up this way? Have you taken the time or arranged the setting in which the program takes place? Having a layout gives a sense that time has been taken to consider how a program takes place. It gives the visitor a sense that there is a program and that it is set up in a certain way and not chaotically thrown together (unless a chaotic arrangement was what you were looking for). Your own proximity to the visitors also says something. Could it be misinterpreted? Maybe calling attention to it may make your meaning more clear. Some people are very uncomfortable being close to someone they do not know, or being at a distance may be taken as aloofness by your visitors. Maybe give yourself more space to address a larger group of people without feeling the need to shout at the people visiting closest to you. Such arrangements need to be examined and the intentions made clear.
A staged area allows people to stop and interact with the
environment that is there naturally to selected to be there.
It also allows you to make your point while resting. This
area is staged for a discussion on the beaver and its
impact on the fur trade as well as provide visitors a place
to sit, but is open to the elements.

During the program or presentation, it is best to have the places to stop and discuss the topic at hand. For a tour, this is simply part of the tour. Examples would be a scenic vista where one could see the whole area and using it to describe wide movements or an overall plan. Sometimes it is to get out of the sun and into the shade but being close enough in the area to still make the talking points relevant. This idea is called staging. Each stop is a stage where a point is discussed. This idea also works with pacing. Pacing is the speed or timing in which the program takes place. Going slowly helps make programs last longer, and gives the interpreter the time to be thorough. It will also be appreciated by folks like the elderly or people with special considerations. Brief but frequent stops might be difficult on the people
just mentioned. It is probably best to warn them ahead of time if you think some people might have difficulties. A mix of brief stops and long stops could also be effective if practiced.

Logistical considerations like seating, enough room, shade, temperature, weather, climbing stairs, descending stairs, length of time, and length of travel are all things that an interpreter must consider for the ease of the visitors. But they can also be used to help illustrate interpretive points. For example, telling the visitors that the hike will be 7 miles might cause some to drop out, but the view may be worth the trip, or that the same 7 miles was the exact trail that the people we are discussing actually traveled (using power of place as a technique as well). Perhaps stating it was bright on the day, or its always bright here may help visitors understand certain actions by individuals who may have been fighting glare. Of course, if the glare is too much, it may impede the satisfaction of your visitors on your program.

These subtle techniques are only some of the techniques that fit into this category. For next month's edition, personal subtle nuances such as body language, personal appearance, and language will be the main focus.

Thursday, May 25, 2017

The Interpretive Toolbox: Introduction and Planning

Interpretation as a discipline and an art can end up being very theoretical. It is all well and good that we make our material meaningful to visitors, but what can be done to get them to see and understand? What practical techniques and methods are at the disposal of the interpreter? This month's edition will launch a new series focused on the interpretive tools the interpreter uses to make connections between the resource and the visitor. Some of these techniques were discussed before, but there are plenty more to use. The beginning of this series will begin from within the interpreter and work from inherent attributes of self to subtle interpretive techniques using more and more complex forms of interpretive techniques in following editions. This series will center on four zones from which Interpretation comes from: Planning, Subtle Skill, Verbal, and Active. Or, simply, this is about what you think, how you act, what you say, and what you do.

Novel arrangenment of Interpretive techniques and method
into classifications starts with the innermost and works to the
most active methods. Nothing really new, just a different way
to characterize information like this.
When the Creating A Program series was created last year it left out techniques. Now is to the time to learn those techniques and incorporate them. The first will be the furthest inside the interpreter. It starts in his or her mind as the planning stage. The planning stage takes into account the Verbal and Active portions and to a lesser degree what is a Subtle skills in the interpreter, but it is so instinctual and innate that some of the techniques might be more difficult to control because there are so many nuances involved. The second zone is the Subtle actions of the interpreter, things like body language, location, volume. As mentioned, these are harder to plan because they generally are subconscious action that give messages to the visitors. Some of these subtleties might even be counterproductive as without even realizing it, the interpreter is sending a mixed message. Verbal communication is essential to interpretation because that is the main way that an interpreter will communicate with the audience. The interpreter provides much of the new information to the visitors. Granted, some will be through reading material but generally the visiting public will rather listen to an interpreter than read materials, and even less will do both very well. The last zone of interpretive technique is Active; this is where a lot of the fun stuff comes from. Generally speaking, the more active a program is, the more enjoyable and/or more memorable it will be as well.

But first, a review of the Interpretive Equation. An interpretive opportunity comes from the ability to use the Knowledge of Audience and Knowledge of Resource with Appropriate Techniques. This series is all about the "Techniques" portion of this equation. Not every technique is the right technique to use in a given situation, especially the more complex ones. Talking with a seasoned interpreter may give the reader some hints as to which techniques are better than others as well. Consider the types of programs used, such as a talk, tour, or activity and then try to evaluate the appropriateness of a technique in abstract and then in practice. Just because a technique sounds good, does not necessarily mean that it will work according to how it is planned. Planning one's program and techniques out ahead of time will help prevent a wrong technique from lowering the quality of the interpretive program. This is where the knowledge of audience comes in. A coloring activity may not be suitable for all ages. Consider also the context of when and where the program will take place before evaluating yourself.

Since all programs are planned, it is important to look over some of the factors that help make a successful program as this zone really informs all the other zones. Much of this has already been described in the Creating a Program Series. In planning and creating a program the interpreter might have used some interpretive techniques without even realizing it. This is not necessarily bad, but every part of the program must be used for full effect. Some of the program-related materials created for programs are products of planning.

Get organized!
One of the most powerful tools in your Interpretive toolbox is organization. The program must be organized; it cannot be a random doings-of-things. Organization gives the visitor a framework in which the program occurs. A disorganized program feels poorly thought out and unprofessional. Using effective transitions helps guide the visitor along and gives a professional polish to the program. Having written objectives and goals help define what the interpreter is after, as well as declare on paper what the intention of the program is about, not just for the interpreter, but also for people trying to review your work or help you make it better. The layout of materials should be easy to follow. Cluttered material is a turn-off to a lot of people. Other planned features include things like font, the way the letters look on printed material. Having a thematic font can help set the tone and setting. Researching historical fonts to give an added touch to printed materials that the visitor interacts with in active techniques. For example, using an original document out in the open might damage the resource, or the handwriting difficult to read, so having a copied text printed in a period handwriting font sells the program a little better rather than using Times New Roman for everything. Do not get too carried away with wild fonts. On the other hand, using large size blocky fonts are easier to read from afar, near, and helpful for people hard-of-seeing. In design, alignment, reader flow, and simple are key in creating passive text based labels, signs, and other printed materials. Carefully crafting each sentence's structure and word choice for maximum effect is important. This applies to verbal portions as well. How you say it will come later, but planning what to say first is something that must be planned ahead of time.

Pay attention to how each font makes you feel when you read.
Then add your own inflection to the text and see how the
sentence's meaning changes.
As mentioned, planning touches all other zones from the most subtle nuance to wildly engaging activities, so there is going to be overlap, or techniques and methods that are not exclusively planning centered or verbal or active, but will require combinations in different proportions in order to be successful. Next edition will deal with the subtle, foundational techniques and methods.

I relied on Handles: A Compendium of Interpretive Techniques to Help Visitors Grasp Resource Meanings by Peggy Ann Scherbaum for ideas and material to share; not everything I present is of my own creation, but a synthesis of a lot of other ideas. Because of that, I felt this text needed to be mentioned as a great and clear resource for using interpretive techniques.

Friday, April 28, 2017

What is the Kentucky experience?

What defines a people in a place? Is it their language, their borders, terrain, or customs? Is it their stories, history, and heritage? These are some of the deep thoughts that I wrestle with as I roam about America. I've crisscrossed it a few times already and I guess I will crisscross it a few more times before I am settled somewhere as I am preparing to pull stakes and strike the tent for a new adventure at the beginning of next month. It will be to a familiar place, but as I turn to leave Kentucky, I have to ask myself these questions and ponder deeply what it means to be from somewhere - anywhere. So as I prepare to depart Kentucky, I ask myself, "What is the Kentucky experience?" or can it be defined? What makes this place different or special? So as my way of saying goodbye to Kentucky, I will share some of my experiences and see if they make sense of this place I have called home for nearly a year.

Kentucky is known for a number of things: bluegrass music, fried chicken, baseball bats, horses and racing them, bourbon whiskey, a history of pioneers, and scenic vistas among other things. When I lived in Iowa, I sought out what Iowans did or thought important to them to get in on their experience, for I never knew how much time I had before I had to leave. Kentucky was no different, so my family and I went and sought out things that made Kentucky what it was.

Corbin, KY. Origin of Finger Lickin' Goodness
Perhaps one of the most enduring marketing fast food restaurants, Kentucky Fried Chicken, directly associated place with product. Started by the iconic Harland Sanders, his recipe of herbs and spices became a franchise phenomenon and as a result put new interest in fried chicken as a fast food as well as promoted the state from which it originated. We visited his original restaurant in Corbin, KY. There, a modern KFC restaurant and a museum of the original restaurant to the franchise and motel coexist. In recent years I have taken an interest in eating healthy and fried chicken is not a priority to me, but I felt that it would only be appropriate to have some while I was there, to "Live a little!"

Churchill Down Racetrack is home of the Kentucky Derby
Another way the Kentucky remains in the public eye is with the Kentucky Derby, held every May.
The race takes place in Louisville, Kentucky's largest city, at Churchill Downs racetrack. This is probably one of the most famous horse races in the world and one of the oldest in America, since 1875. Three year old thoroughbreds race one and quarter miles in what some have described as "The Most Exciting Two Minutes in Sports". The Kentucky Derby is the first race of the Triple Crown distinction, followed by Preakness Stakes, then the Belmont Stakes. If the same horse wins all three of these races, that horse then wins the Triple Crown. The race has a number of traditions that make it an iconic event, such as drinking mint juleps (a bourbon cocktail), eating burgoo (a stew), dressing up (usually ladies wear lavish hats), and as the horses are led out, the state song," My Old Kentucky Home" by Stephen Foster is played. Very early on in our time in Kentucky, we visited Churchill Downs and toured the museum and racetrack. A few people have cautioned us about the race since it is in a rough neighborhood of Louisville and suggested the more relaxed and sophisticated races at Keeneland as a better alternative. However, we did not attend any races during our stay.

Bourbon is a booming business in Kentucky as 95% of all bourbon is made here. Bourbon is a form of whiskey, but not all whiskey is bourbon as there are strict rules regarding what can and cannot be called bourbon. Distilleries have caught onto the tourism aspect to their craft as their sales boom domestically and internationally and many have made welcome centers to teach thirsty visitors about the process of making their drink and their history. Kentucky Tourism board partnered with a number of popular distilleries to form the Kentucky Bourbon Trail, a program that results in a free gift after visiting all the participating distilleries. This drink influences nearly every kind of culinary offering in the state from barbecue to condiments to the bourbon ball desserts. We took the time to visit all of the participating distilleries to get our free t-shirts. While I would not describe myself as an avid fan of bourbon, I certainly have learned to appreciate it. Pro-tip: If you throw it back like a cowboy in a saloon, you are doing it wrong.

Me and my Lil' Slugger
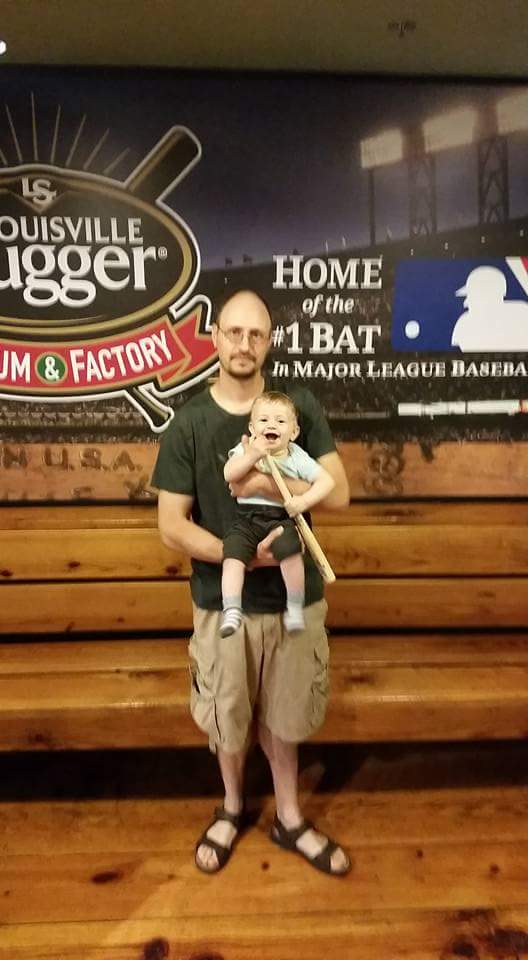
Since the days of my youth, I have enjoyed baseball. It hearkens to an older time that valued skill and patience. Anyone who has handled a bat know about Louisville Slugger bats; they are one of the top names in a short list of manufacturers. We visited this iconic business with its Guinness World Record breaking baseball bat leaning outside the front door and learned about baseball, how bats are made, and how they have changed over the years. I even managed to whack a few balls in their batting cages using Derek Jeter's bat. Across the hall was a traveling exhibit of Ripley's Believe It Or Not. Louisville itself is an interesting town that straddles traditional and contemporary, homey and trendy, and is a great place to go visit.

The history of Kentucky is long. Pioneers had been coming through the Cumberland Gap since before the American Revolution. The pioneer life is marked across this land in various forts and village settlements. Daniel Boone and others made their careers on coming though the Gap and discovering, exploring, and settling this land and the people in turn honor them. The sons and daughters of those settlers reached further and further west as they filled in the land. It is this rural influence and setting that would later birth a new form of musical expression that took its name from the nickname of this state, Bluegrass. Westward settling came in earnest after the Revolution. The Lincolns settled here just south of Elizabethtown, and gave birth to a son, Abraham, who would become the 16th President. His birthplace in Hodgenville is where I had the good fortune to work, learn, and practice my trade of Historical Interpretation as a first year seasonal Park Guide with the National Park Service. It was an honor to be here for the Centennial year of the Park Service and be a part on this very special occasion. In spite of frustrations and struggles, it had its great moments as well. I will miss the folks there tremendously as I transition to a new position in a familiar setting - Fort Scott, Kansas!

Known locally as "Ranger Ryan"at
Abraham Lincoln Birthplace National Historic
Park in Hodgenville, KY
In retrospect, a place is defined by its people, but also defined by the heritage those people have through their collective experience. It is a mix of things that are difficult to pull apart from each other. It's not necessarily the individual ingredients of the stew that make it delicious, but the parts working in concert. All the things I have mentioned in this post make up Kentucky and my Kentucky experience, and no one part singularly defined it. It is rather the groups of these experiences, the places, the people, and the time spent that makes Kentucky different and a wonderful place to call "My Old Kentucky Home".

Saturday, March 25, 2017

Creating an Interpretive Program - Part 6 Alternatives featuring Interpreting for Park Visitors by William J. Lewis

When I first thought of putting together a set that resulted in the Creating a Program series, I had taken a moment to look around at other materials in program creation. There is more than one way to make a program. A book by William J. Lewis was brought to my attention called Interpreting for Park Visitors. It was a case of not judging a book by the cover as it seemed that this book would be superficial and not very helpful. The actual cover had cutesy animals gathered around a plump, pink, baby-thing in a Ranger hat. I admit I dismissed it and went on with the Interpretive Process Model of program creation. With the conclusion of the Creating a Program series, I picked it up for some career enrichment reading on a flight to California I made recently and it turned out to be a worthwhile after all. Rather than being superficial, it was more lighthearted guidance with another era. While Tilden wrote for his time, Lewis wrote for his; Tilden for the 1950s, Lewis for the late 1970s into 1980s. This post was initially going to be a book review but with the end of the Creating a Program and the renewed personal interest in this book, I decided to make it part of the series as an alternative means of program creation to highlight that there is no one way to create a program.

Interpreting for Park Visitors by William Lewis is designed to be an introduction to interpreting for the total beginner. It is likely that in that day and age, that interpretive courses were not available and standards of qualifications for being a National Park Ranger were much lower than they are now. It describes what interpretation is and how it is done without getting too deep into Tilden's books. The first part deals with what an interpreter is and what they do. Part Two explains the basic principles of interpretation discussing the roles of the visitor, the interpreter, and the Park (which you can adjust for your own location, of course). The second chapter lays out the goals of interpretation and third details the primary elements of interpretation. The third part brings specific application of primary elements of interpretation into focus. Chapter 4 explains basics like giving information at an information booth, such as orientation in a Visitor Center or roving out in the area. In Chapter 5 talks are the main idea explored in various settings. The next chapter looks closely at walks, hikes, and tours, which are basically like a talk but with some movement involved. After that came a chapter on "special considerations" that include location considerations, accessibility and ability preparedness, age considerations, language and cultural barriers. A chapter on self-evaluation is included and followed by more resources.

The part that will concern the reader regarding program creation is in Chapter 3 under the subtitle, Organization. This came as a surprise since the opening subtitle was on involvement of the public in a program then the text suddenly went into planning of a program. In this regard, I think the sequence of the book is out of order, since one should plan to involve the visitor but that should be organized first. "Picking a Topic" is the first subheading under organization. The topic is meant to be broad but keeping the audience involved and the significance of the site. It mentions that sometimes the topic will be picked for you by a supervisor or you may be free to make up whatever you would like to explore. The topic is then tempered by the Theme. Again, theme is more like a message or a thesis than a topic. Under Lewis' guidance a theme should:

  • be stated in a short, simple, and complete sentence.
  • contain only one idea
  • reveal the overall purpose of the presentation
  • be specific and
  • be interesting and as motivational in wording as possible


Having selected a theme, the presentation program becomes about developing that theme. Lewis suggests setting up an outline like a formal paper:
I. Introduction
II. Theme
III. Theme Development
A. Interpretive Main Heading 1
i. Supporting point 1
ii. Supporting point 2
B. Main Heading 2
i. etc.
iii. etc.
C. Main Heading 3
i. etc.
ii. etc.
iii. etc.
IV. Conclusion

The Main Headings will be a major practical part of the program, or the subthemes of the Interpretive Process Model that I describe previously. The supporting points make up the talking points of the program. All of this is the framework or the skeleton of the program that still needs further development. With this framework in place then the decision must be made as to what kind of arrangement the program needs to take place, such as a topical, chronological, climatic, spatial, or process arrangement.

The introduction is important because it will set the tone of your time with the visitors. According to Lewis an introduction consists of creating a favorable atmosphere, an aroused interest in the subject, and a clarified purpose of your presentation. He goes into further details into how these three can be achieved but with some imagination, you can think of a few ideas too. The conclusion can basically be a summary of the main points and theme. He suggests using a strong and memorable last sentence to create a lasting impression on the visitor. On an interesting note, he also recommends not weakening this impact by taking questions, thanking the visitors for coming, or for their attention at the end.

For the main body of program Lewis makes some suggestions for what we would identify as interpretive techniques. This support for the main points comes from accurate and factual information that comes from research and is probably the most important and practical thing that can be done in a program. But how this is done s described in a few ways. He cites using examples and related stories, quotes and citation, compare and contrast, and visual aids to help develop the main points. He also emphasizes the use of language in understanding, especially in transitioning from point to point to form a more cohesive narrative. He defines a good transition as a summary of the preceding idea, an establishment of the relationship of this idea to a new one, and a preview of the new idea. He also wants his readers to think more deeply about the words they use so that they are more understandable by all visitors, using concrete words that evoke imagery, and speaking informally, rather than from a prepared text. Following the use of language naturally arises a need to discuss delivery. This includes verbal and nonverbal cues such as being enthusiastic, physically direct, self-assured, and being friendly and approachable. These and more are important things to consider when creating a program.

Interpreting for Park Visitors is much more than a program creation book as indicated nearly in the beginning. It goes into much greater detail than related here and would be a gentle introduction to interpretation for a person interested in becoming an interpreter. There are many ways to create a program. I have demonstrated two methods in this series and hope that they have been helpful in helping the interpreter create better programs. One of the glaring deficiencies that I have left out of this series are the Interpreter's Toolbox: techniques and methods of interpretation. They are the ways in which the interpreter helps make information useful beyond narrative (and narrative is a interpretive technique!). With the conclusion of the Creating an Interpretive Program series, I am launching a whole new series based on providing the interpreter with more tools to put in the tool box of interpretive technique repertoire and a description on how to use with pros and cons of each method. Look for it next month!